How to Laser Engrave Photos on Slate Stone
Laser-engraved images have become highly coveted novelty items in today's gift market. Delving into the realm of engraving pictures on unconventional materials adds an extra layer of experimentation, forming part of the learning process and the joy of utilizing a CO2 laser engraver. While engraving text or logos is a common starting point for most laser users, the art of photo engraving on stone stands out as a sophisticated technique that any professional or DIY enthusiast should aim to master. In this comprehensive guide, I will walk you through the process of preparing an image for laser engraving using Adobe Lightroom and LightBurn laser software, as well as demonstrate how to engrave a photo on slate stone.
The Allure of Laser-Engraved Stone
Slate, a naturally occurring rock formed over 500 million years ago from compressed clays and volcanic ash, stands out for its eco-friendliness. Throughout history, slate has been mined and utilized for various purposes such as roof coverings, floors, gravestones, and household trivets due to its exceptional heat resistance. Despite its soft nature and tendency to shear easily, slate exudes a rustic charm with its non-uniform color palette ranging from light to dark grey and occasional imperfections. These imperfections, far from detracting, actually enhance the appeal of slate as a canvas for photo engraving, where its innate beauty elevates the final piece.

Exploring the Art of Laser Photo Engraving
Photo engraving involves the intricate process of transferring vibrant images onto diverse materials. While alternative methods of picture engraving exist, utilizing a laser engraver to imprint photos on wood, acrylic, glass, and stone like slate has gained immense popularity. Laser-engraved photos represent some of the most sought-after products in the laser engraving industry, albeit with added complexities due to the nuances involved in image engraving. Many users opt to focus on mastering photo engraving on a specific material, embracing the journey of trial and error as they hone their skills. Embrace the challenge of picture engraving, understanding that it demands practice and experimentation, particularly when working with unconventional materials.
Preparing Images for Laser Engraving
Crafting a stunning 3D laser-engraved photo extends beyond the engraving process itself. Several crucial steps are essential in preparing an image for laser engraving, each contributing to the final result.
Converting a Photo for Laser Engraving
Step 1: Image Selection
Choosing a suitable photo for laser engraving is paramount. Opt for an image rich in detail, devoid of large areas of uniform color. Pay attention to potential merging of black and white areas that could compromise image clarity. Developing an eye for selecting ideal images for photo engraving is a crucial aspect of the process.
Step 2: Black & White Conversion
Given that laser photo engraving operates in a binary black-and-white realm, color information must be discarded by converting the photo to black and white. Utilize software like Adobe Lightroom to accomplish this step seamlessly.
Step 3: Material Considerations - Dithering
After converting the image to black and white, the photo will contain 256 shades of grey, essential for creating shadows and details.


While some materials like wood respond well to varying power levels for creating light and dark shades, others such as slate present challenges due to their engraving behavior. Employ dithering techniques, akin to those seen in newspapers, to create a grayscale illusion using tiny dots for slate photo engraving.
Step 4: Inversion
When engraving on materials like wood, charred areas reveal black dots, creating a clear image. However, with slate, the laser ablation results in light grey areas, necessitating an inversion of the image before engraving. Software tools like LightBurn simplify this process, handling both dithering and inversion seamlessly.

Step 5: Image Refinement
Fine-tuning the photo before engraving enhances the final result. Adjust contrast in darker areas, brighten whites moderately, and ensure there are no extensive black or white regions. Each image presents unique challenges, requiring a personalized approach to achieve optimal engraving results.
How to Engrave Photos on Slate Stone
Selecting the Right Laser Engraver
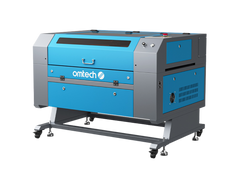
Owning a suitable laser engraver is crucial for successful photo engraving on stone. A 60W CO2 laser engraver like the OMTech MF2028-60 strikes a balance between power and precision, making it an excellent choice for engraving on slate.
Choosing the Focal Lens
Experimenting with various focal lengths for the laser head is essential. For slate engraving, the stock 1.5” focus lens is ideal for achieving a dot size suitable for engraving at 318 dpi.

Testing Your Material
Before embarking on the final engraving process, conducting a test engrave is highly recommended. Create test patterns using the actual image to be engraved, adjusting power settings for optimal results. Avoid excessive speed settings that could compromise image quality.
Fine-Tuning Laser Settings
Initially, you might experiment with a wider range of power settings, but once you have a general idea, it's crucial to fine-tune them. In my case, I opted for power levels of 18%, 16%, 14%, and 12% at a speed of 250mm/s. It's important not to push the speed too high as this can accelerate wear on your equipment, such as the rails, and potentially cause belt stretching due to the laser head's rapid movement.

When configuring each image layer for photo engraving, ensure the DPI is set to 318 to align with the original image resolution.
Don't forget to indicate to LightBurn that you want the image inverted by selecting the appropriate option.
For dithering, choose one of the pre-set patterns—I typically opt for Jarvis, which is well-suited for image engraving. While a comprehensive discussion on dithering techniques could be explored in a separate article, it's worth noting that each algorithm introduces randomness to the dots, enhancing the final image based on the specific characteristics of the image being processed.
Learn more: How to use LightBurn software
Finalizing the Engraving
Prior to the final engraving, create a border around the image and engrave a contour box for easy cutting if framing the piece later. Apply a coat of matte acrylic varnish to seal the engraved piece and enhance contrast.
Saving Your Settings
It is essential to save optimal engraving settings in the LightBurn material library for future reference. This ensures consistency and efficiency when undertaking future laser engraving projects on slate.
In Conclusion
Mastering the art of CO2 laser cutter photo engraving on stone demands attention to detail and a methodical approach. By selecting the right image, preparing it meticulously, and testing materials thoroughly, you can achieve exquisite photo engraved gifts. Slate, available in various pre-cut forms, serves as an excellent canvas for laser photo engraving, enhancing the natural beauty of the images. Embrace the creative process and enjoy the journey of crafting personalized and elegant photo engravings on slate, elevating your gift-giving to a new level of sophistication.


