How to Laser Engrave Wood Without Burning
Since ancient times, wood has been the preferred material for construction and manufacturing by humans. Its abundance in nature, along with its ease of manipulation and long-lasting properties, have made it highly advantageous for various uses. Wood can be easily customized with patterns, text, logos, and more. While traditional methods like hand carving, painting, and burn marking have been historically employed, laser engraving wood projects have become increasingly popular in recent times. Wood remains a key material within the laser engraving community.

In the present day, wood engraving has become a profitable venture for businesses and a recreational activity for hobbyists. Many CO2 laser machines have been specifically designed for wood engraving. Despite the suitability of these machines for engraving wood, lasers can sometimes leave behind burn marks as unintended consequences. These burn marks can detract from the beauty of your wood engravings, giving them an undesirable finish. Acquiring the skill to laser engrave wood without causing burns is essential for any laser woodworker.
This article will delve into the causes, prevention methods, and solutions for burn marks to provide appropriate education. It's important to note that there are numerous ways to engrave wood, and different wood types absorb laser energy differently. Expect some trial and error, especially when working with a new type of wood. OMTech laser experts will share essential tips and tricks on eliminating burn marks, ensuring you achieve clean, engraved wood without unnecessary hassle. Let's begin.
Causes of Laser Burn Marks on Wood
EXCESSIVE HEAT AND DEBRIS
The primary causes of burn marks while engraving wood are excessive heat and debris. All wood engraving methods with a laser involve generating heat through laser energy. However, excessive heat applied to expedite work can have adverse effects, particularly when debris on the wood's surface combines with the laser beam's excessive heat. Therefore, it is crucial to be mindful of these two factors before starting wood engraving.
CONTACT WITH THE LASER BED
Contact with the laser bed can also influence the occurrence of burn marks, especially on the underside of thin woods due to direct contact with the laser bed. The structure of the CO2 laser machine can impact burn marks, and the laser bed should facilitate the easy dissipation of heat and fumes generated during wood engraving.
Various forms of laser beds, such as honeycomb cells, aluminum lamella, aluminum engraving table, and aluminum knife, cater to different wood types. Understanding the wood's nature is essential to choose the best laser bed. Testing multiple workbed styles can help you learn how to engrave wood with a laser without causing burns. The standard honeycomb beds on most OMTech CO2 laser machines provide efficient heat dissipation and are suitable for most woods.
Prevention: How to Engrave Wood Without Burning
As the saying goes, "prevention is better than cure." It is more beneficial to learn how to engrave wood without causing burns rather than focusing on removing burn marks after engraving. Most laser burn marks can be avoided during wood engraving through various methods:
USING LASER ENGRAVING MASKING TAPE FOR WOOD
This method can prevent fumes from staining the wood surface by covering it throughout the engraving process. Smoothing out any air bubbles with a plastic tool is essential to prevent worsening burn marks. After engraving, removing the transfer tape with a plastic razor blade can simplify the process and ensure a clean wood surface free from burn marks.
Finding laser engraving tape with the right level of adhesion is crucial. For example, birch plywood, with its high moisture content and uneven grain structure, can experience the backing peeling off during engraving, leading to a burnt appearance.
Given the diversity of wood engraving methods, experimenting with different types of laser engraving tape in small quantities can be beneficial to find the most suitable one.
ADJUSTING THE LASER ENGRAVER SETTINGS
Adjusting the settings of the CO2 laser engraver, such as speed and power, is essential to reduce burn marks on wood. Finding the optimal settings for speed and power based on the wood type is key to preventing burns. Adjusting the laser focal distance can also significantly reduce burn marks and ensure smooth results.
USING AIR ASSIST
Using compressive air assist during engraving can help reduce burn marks, although it may not eliminate them entirely. Proper utilization of air assist is challenging for beginners and can be costly. However, it is one of the most effective ways to engrave and cut wood more efficiently.
COMPARING WOOD TYPES
Comparing different wood types in advance is crucial to understanding which woods are more susceptible to burn marks. Some woods are more prone to burn marks due to glue binders present in them. Testing different woods for speed and power settings can help reduce burn marks. Woods like Plywood and MDF contain glue binders that contribute to burn marks, while Basswood, Cherry, and Alder are excellent choices for laser engraving.
DAMPENING THE WOOD BEFORE LASER CUTTING
Dampening the wood before laser cutting by briefly soaking it in water can help prevent burn marks. Moisture helps keep the wood cool while absorbing laser energy, reducing the likelihood of burn marks.
Correction: Removing Laser Burn Marks
If burn marks are present after processing wood, they can still be removed. Learning how to eliminate burn marks post-engraving is as crucial as taking preventive measures.
SANDING
Sanding using sheet sanders is a fast and controllable method to remove burn marks. Medium grit sandpaper can effectively eliminate burn marks, followed by higher grit sandpaper to achieve a smooth finish. For detailed engravings with minimal depth, sanding lightly is important to preserve the engraving's beauty. Removing dust before finishing is essential to achieve a clean final product.
COATING
Applying a coating on finished woods can help remove burn marks. Coating the wood with a contrasting color can create more contrast in the engraved area. While this method may not completely remove burn marks, it can prevent them from adhering to the wood. Burn marks can be easily cleaned off using denatured alcohol or furniture polish.
GENTLY SCRUBBING
Gently scrubbing burn marks with a toothbrush or fabric brush alongside liquid soap is another method to remove them.
Conclusion
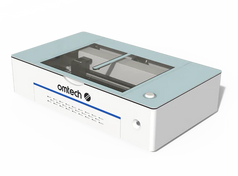
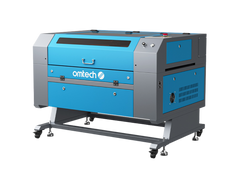
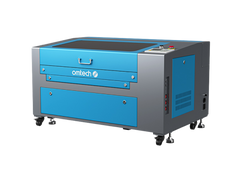
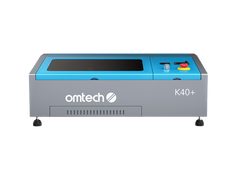
In conclusion, by now, you should have a better understanding of how to engrave wood without causing burn marks. Taking preventive measures before engraving is crucial to avoid dealing with burn marks afterward. OMTech offers top-quality desktop and cabinet CO2 laser machines suitable for engraving various wood species. If you wish to test the machines before purchasing, our Southern California showroom is open during work hours. Partner with us for your next engraving project to ensure its success.


